So, I decided to add a new section on product reviews--yayyy! After all, there's nothing more I love than trying and falling in love with new products (that's why I love my Birchbox subscription so much!) This is a very special post because it is the first one of its kind on my blog.
First and foremost, this post was made possible due to the generosity of the founder of Slice, who sent me a pair to demo and review, as well as my friend Kim for putting the two of us in touch, always recommending great beauty loot, and inspiring me to branch out in a new direction on MIWS. So a big thank you to both!
Let's get down to it, shall we? The product I am reviewing are the Slanted Soft Touch Slice Tweezers, pictured below. They retail for $19.99 here on the Slice website. I've tried a few different types of tweezers in my life, but here is what I particularly liked about this pair:
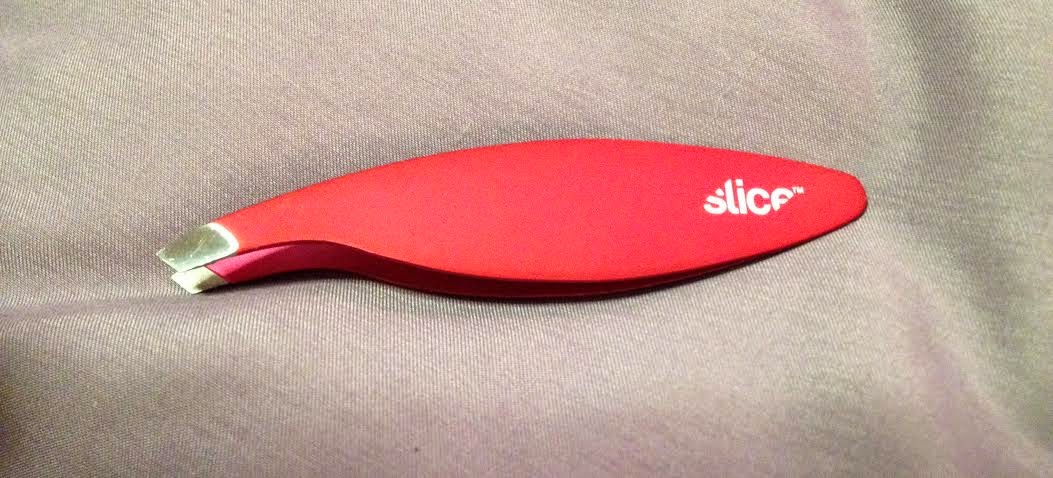
-Design: They are big--but where it matters most. The size didn't obstruct my view when I was plucking my eyebrows with these bad boys. They are comfortable to hold in your hand and easy to control. They were designed by famed architect Michael Graves!
-Ease: They are made of a rubberized finish, so they don't slip out of your hand--which is perfect for klutzes like myself.
-Precision: The tip is slanted, so I was easily able to pluck those stubborn little hairs that normally are not even long enough to pluck as they are growing back in.
-Sanitary: These are easy to clean--I just used an alcohol wipe to clean the tip, which is made of stainless steel.
-Sharp: If you aren't using these for beauty purposes, but to remove a sliver, for instance, you won't have any trouble at all! I have used dull tweezers before that have had a rounded tip, and they are not the greatest for eyebrow plucking or removing slivers.
-Color: Because who wants another boring, silver pair of tweezers? I love the bold pop of red, and it makes it easy to find in my makeup bag.
On a scale of one to ten (with one being the worst and ten being the best), I would give these Slice tweezers a nine! I would highly recommend them as an essential tool to any beauty arsenal.
Monday, July 28, 2014
Tuesday, July 22, 2014
Wisconsin Beer Cheese Dip
Being a Wisconsinite, I love to take pride in all things Wisconsin--especially cheese, milk, and beer! I found this recipe on Pinterest and gave it a try--it was such a hit at my cousin's 4th of July party, I had to make a batch just for our family to snack on! I love dips, and this is a really simple one.
Ingredients:
-1/2 can beer (I used Miller High life, a Milwaukee favorite, of course)
-2 blocks of cream cheese
-1 packet dry ranch seasoning
-shredded cheddar cheese
-pretzels or chips (for dipping)
1. Let cream cheese sit out until room temperature (I heated mine in the microwave for like 2 minutes because I was impatient!) Combine cream cheese, beer, and ranch seasoning in a bowl and mix well.
2. Transfer dip to a Tupperware container. Place in fridge for 2-3 hours.
3. Before serving, top with shredded cheddar cheese. Serve with pretzels or chips.
Location:
Milwaukee, WI, USA
Monday, July 21, 2014
Smelly Shoe Repellent
I am not a fan of wearing socks, as much as I can possibly get away from it. I even own those little nylon socks that barely show in flats, but they always irritate me, bunch up and don't stay in place in my shoe. So naturally, my shoes can get a little smelly when my feet sweat. I saw this great trick on Pinterest, and it really works! I do this after I take my shoes off and put them on the shelf.
Materials:
-spray bottle
-water
-rubbing alcohol
1. Add 3/4 of your spray bottle full of water and the remaining 1/4 full of rubbing alcohol.
2. Before use, shake well and spritz 2-4 sprays inside the shoe and let air dry.
Materials:
-spray bottle
-water
-rubbing alcohol
1. Add 3/4 of your spray bottle full of water and the remaining 1/4 full of rubbing alcohol.
2. Before use, shake well and spritz 2-4 sprays inside the shoe and let air dry.
Location:
Milwaukee, WI, USA
Tuesday, July 15, 2014
Top Loader Washer Cleaning
When I was doing my laundry recently at home, I couldn’t
help but notice that the washer was a little…well, gross. It needed some TLC. I
remembered seeing instructions on how to clean a washer on Pinterest, and
decided to scrub that bad boy from top to bottom. After all, what’s the point
of washing clothes in dirty water and bacteria? The total cleaning takes 3
cycles, but you really only need to do it twice a year, which I can definitely handle. The
bleach and vinegar kill the bacteria and get your washer sparkling in no time. Trust me, you don't want to see the before picture!
1. Scrub any visible dirt/mildew out of the inside of the
washer (including agitator) with a magic eraser.
2. Fill washer with hot water. Add in one quart of bleach.
Let washer agitate for one minute. Then, let sit for an hour. Use washer’s
longest cycle to rinse.
3. Fill washer with hot water. Add in one quart of white
vinegar. Let washer agitate for one minute. Then, let sit for an hour. Use
washer’s longest cycle to rinse.
4. Now, while I was waiting for that second hour to pass, I
actually removed the bleach tray and cleaned it and scrubbed down the outer
surface of the washer. I detailed it by getting in all the nooks and crannies
with a magic eraser.
Location:
Milwaukee, WI, USA
Monday, July 14, 2014
DIY Bath Bombs
Ok, I admit that I am a little late to the game, but I
didn’t know what Lush was until I did my summer internship in Montreal back in
2007. We didn’t have any close by in Wisconsin, but now we have one in Mayfair
Mall. I like their stuff a lot, but man—it can be pricey! I got some bath bombs
as a gift for Christmas a few years ago, and really, I like anything for the
bathtub. I discovered a DIY bath bomb
recipe here and decided to give it a whirl.
But before I jump into that, here are my learnings
from this project: I recommend getting smaller ornament molds, as mine were
HUGE! I ordered 80 mm ones on Amazon, and they kinda broke easily too. Big ones
means you only make 2-3 bath bombs per batch, vs. a smaller mold of possibly many
more bath bombs. Also, all of the ingredients together are a bit pricey. So, I
guess the difference is spend the money at Lush and have someone else make them
or spend it yourself and do all the work. But you do save a bit by DIYing. I
would think plastic Easter eggs would make great molds also! Also, a little food coloring goes a LONG way! My bathtub water was super yellow when my bomb dissolved completely, but the color did not stain me or the tub.
Materials:
-8 oz baking soda
-4 oz Epsom salt
-4 oz cornstarch
-4 oz citric acid
-2 tsp baby or almond oil
-3/4 tsp water (or witch hazel)
-2 tsp essential oils of your choosing (I had spearmint, eucalyptus, orange, and lavender)
-food coloring
-80 mm or smaller plastic fillable ornament molds that snap together (I got , but definitely recommend a smaller size)
1. Mix the salt and all of the powder ingredients together
(except the citric acid) in one bowl. Set aside.
2. Mix all of the liquid ingredients together (except the
food coloring) in a separate bowl. Slowly add to the powder mix and stir
gently. The consistency should be that of wet sand, where it sticks together
somewhat. If it is not, slowly add a few drops of water at a time while mixing
and squeezing it in your hand until it is like wet sand. Now add the citric
acid and mix. Do not test the consistency with your hand, as the citric acid is
abrasive.
3. Add the food coloring in last and mix well. I did blue
for my lavender scented ones and yellow for my orange scented ones.
4. Fill one half of the plastic ornament past the edge with the mixture. Pack
it down tightly.
5. Repeat with the other half of the plastic ornament past
the edge. Pack it down tightly. Now snap the two halves together. Seriously,
this was the hardest part for me because I could not get mine to snap together.
I broke a few halves trying to do this. There should not be any cracks in the
bath bomb once the halves are together—just a smooth finish on each side.
6. Allow the bath bomb to dry out in a dry place for 24
hours. I did, and here is what happened when I removed the mold (this one even had cracks and still stayed together!)
Location:
Milwaukee, WI, USA
Subscribe to:
Posts (Atom)