Showing posts with label beauty. Show all posts

Sunday, August 10, 2014

Beer Hair Masque

I have heard that beer is good for your hair, and I remember reading back in the day (haha) that pouring a can of beer on your hair and letting it sit can do it some good and make it shiny. This masque was virtually the same as that, with an addition of an egg yolk. I admit, it's a bit of a weird, gross combo--but if you can get past that--it really works! I found this recipe on the Internet randomly.

Ingredients:
-1 egg yolk
-1 3/4 or 1/2 can beer (I used Miller High Life--which was left over from my beer cheese dip recipe!)


1. Mix the yolk and beer together. Silly me, I poured the yolk right into the can and then shook it up. Naturally, it exploded all over my pants and I smelled like a drunk, just in time for work. Umm...yeah. Don't do that. LOL! Save this for the weekend when you have nowhere to go!

2. Pour the mixture all over your hair, and wrap it up in a shower cap or towel. Let sit for 30 minutes.


3. Rinse your hair with warm water until the water runs clear. Shampoo hair as usual, but do not condition.

Monday, July 28, 2014

Slice Tweezers

So, I decided to add a new section on product reviews--yayyy! After all, there's nothing more I love than trying and falling in love with new products (that's why I love my Birchbox subscription so much!) This is a very special post because it is the first one of its kind on my blog.

First and foremost, this post was made possible due to the generosity of the founder of Slice, who sent me a pair to demo and review, as well as my friend Kim for putting the two of us in touch, always recommending great beauty loot, and inspiring me to branch out in a new direction on MIWS. So a big thank you to both!

Let's get down to it, shall we? The product I am reviewing are the Slanted Soft Touch Slice Tweezers, pictured below. They retail for $19.99 here on the Slice website. I've tried a few different types of tweezers in my life, but here is what I particularly liked about this pair:


-Design: They are big--but where it matters most. The size didn't obstruct my view when I was plucking my eyebrows with these bad boys. They are comfortable to hold in your hand and easy to control. They were designed by famed architect Michael Graves!

-Ease: They are made of a rubberized finish, so they don't slip out of your hand--which is perfect for klutzes like myself.

-Precision: The tip is slanted, so I was easily able to pluck those stubborn little hairs that normally are not even long enough to pluck as they are growing back in.

-Sanitary: These are easy to clean--I just used an alcohol wipe to clean the tip, which is made of stainless steel.

-Sharp: If you aren't using these for beauty purposes, but to remove a sliver, for instance, you won't have any trouble at all! I have used dull tweezers before that have had a rounded tip, and they are not the greatest for eyebrow plucking or removing slivers.

-Color: Because who wants another boring, silver pair of tweezers? I love the bold pop of red, and it makes it easy to find in my makeup bag.

On a scale of one to ten (with one being the worst and ten being the best), I would give these Slice tweezers a nine! I would highly recommend them as an essential tool to any beauty arsenal.

Monday, July 14, 2014

DIY Bath Bombs

Ok, I admit that I am a little late to the game, but I didn’t know what Lush was until I did my summer internship in Montreal back in 2007. We didn’t have any close by in Wisconsin, but now we have one in Mayfair Mall. I like their stuff a lot, but man—it can be pricey! I got some bath bombs as a gift for Christmas a few years ago, and really, I like anything for the bathtub.  I discovered a DIY bath bomb recipe here and decided to give it a whirl.


But before I jump into that, here are my learnings from this project: I recommend getting smaller ornament molds, as mine were HUGE! I ordered 80 mm ones on Amazon, and they kinda broke easily too. Big ones means you only make 2-3 bath bombs per batch, vs. a smaller mold of possibly many more bath bombs. Also, all of the ingredients together are a bit pricey. So, I guess the difference is spend the money at Lush and have someone else make them or spend it yourself and do all the work. But you do save a bit by DIYing. I would think plastic Easter eggs would make great molds also! Also, a little food coloring goes a LONG way! My bathtub water was super yellow when my bomb dissolved completely, but the color did not stain me or the tub.

Materials:
-8 oz baking soda
-4 oz Epsom salt
-4 oz cornstarch
-4 oz citric acid
-2 tsp baby or almond oil
-3/4 tsp water (or witch hazel)
-2 tsp essential oils of your choosing (I had spearmint, eucalyptus, orange, and lavender)
-food coloring
-80 mm or smaller plastic fillable ornament molds that snap together (I got , but definitely recommend a smaller size)

1. Mix the salt and all of the powder ingredients together (except the citric acid) in one bowl. Set aside.

2. Mix all of the liquid ingredients together (except the food coloring) in a separate bowl. Slowly add to the powder mix and stir gently. The consistency should be that of wet sand, where it sticks together somewhat. If it is not, slowly add a few drops of water at a time while mixing and squeezing it in your hand until it is like wet sand. Now add the citric acid and mix. Do not test the consistency with your hand, as the citric acid is abrasive.


3. Add the food coloring in last and mix well. I did blue for my lavender scented ones and yellow for my orange scented ones.

4. Fill one half of the plastic ornament past the edge with the mixture. Pack it down tightly.


5. Repeat with the other half of the plastic ornament past the edge. Pack it down tightly. Now snap the two halves together. Seriously, this was the hardest part for me because I could not get mine to snap together. I broke a few halves trying to do this. There should not be any cracks in the bath bomb once the halves are together—just a smooth finish on each side.


6. Allow the bath bomb to dry out in a dry place for 24 hours. I did, and here is what happened when I removed the mold (this one even had cracks and still stayed together!)


7. Add one to your nice warm bath (trust me, one is ALL you will need at this size!) This was the final test for me...


It worked! Fizzy and all, comparable to the real Lush one, like a big glorious citrus ball of bath time happiness.

Monday, April 28, 2014

Eyebrow Shaping

They say eyebrows really can change someone’s look, and I didn’t buy into that very much until I saw all the pictures of celebrities without eyebrows. Yeesh! If you haven’t seen them, I highly recommend them to you—they are totally worth the Google. Think Voldemort—that’s mostly what I was reminded of! I have also seen a few “before and after” pics of celebrities who have changed up their eyebrows by making them thicker, darker, etc. It’s amazing how much it can complement their face or even change it up. I’ve always had eyebrows, but they are naturally very thin. Even if I was to just let them go wild, they wouldn’t get very thick at all. I pluck once every other week just the stray hairs that are really outside of my natural brow.  I don’t need to get them threaded or waxed ever. One time, when wandering around the mall, I decided to stop in and have my eyebrows threaded. I settled back into the chair, the lady came close to my face, smiled and said, “There is nothing for me to thread.” Umm…so yeah...some might say that’s a gift that I don’t have to deal with that.

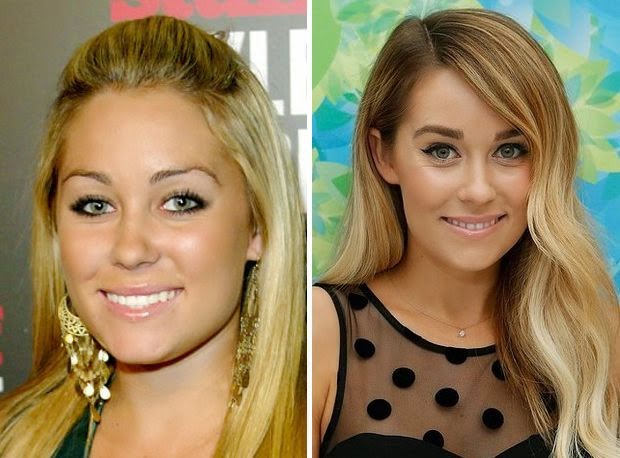
Seriously, just look at Lauren Conrad. Case and point.

I have always struggled with my eyebrows in terms of how to get them to look better—and by better, I mean more shapely, more full, and a little bit darker. I have long been afraid of the pencil, as it can cause such a dark, severe line (in my younger days, I did not color match to my natural color very well at all). About 2 years ago, I discovered the company Anastasia at Sephora. I tried out a blonde pencil and it filled in my thin little eyebrows nicely. So, I bought it and used it for a year and a half. Then, Anastasia came out with a brow powder duo. One shade is lighter, and the other darker. You can actually mix them to get a shade somewhere in between also. I had the Sephora assistant do my brows for me, and she did a decent job. Ok, so it seemed easy enough to use a little brow brush and some powder and fill in my eyebrows. But I still wasn’t going outside of my (thin and short) natural brow shape. Truthfully, I was a little afraid of looking like a dork with unnaturally long/full eyebrows by free-handing them. What if my eyebrow shapes turned out different? What if one arch was higher than the other? There is a saying I have heard and remembered—something to the effect of, “Don’t ever let anyone with bad eyebrows tell you shit about life.” Truth!

Oh, Angelina.
Recently I found out that Anastasia has eyebrow stencils. I was super pumped about this—it’s seriously  really hard to screw up with a stencil I assumed, so I ordered a set of them. I think you get about 5 of them in a pack, so needless to say, I have a lot of choices for “new” brows. I decided to test the water by starting with 
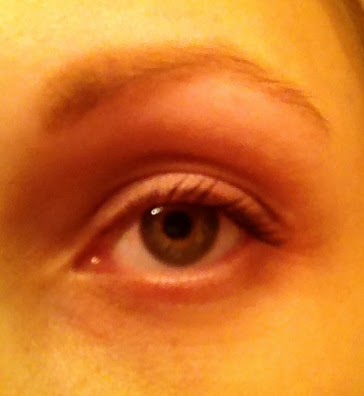
the smallest stencil, the “petite arch.” Here are my before and after pictures, and the steps I took to get them to look fab.
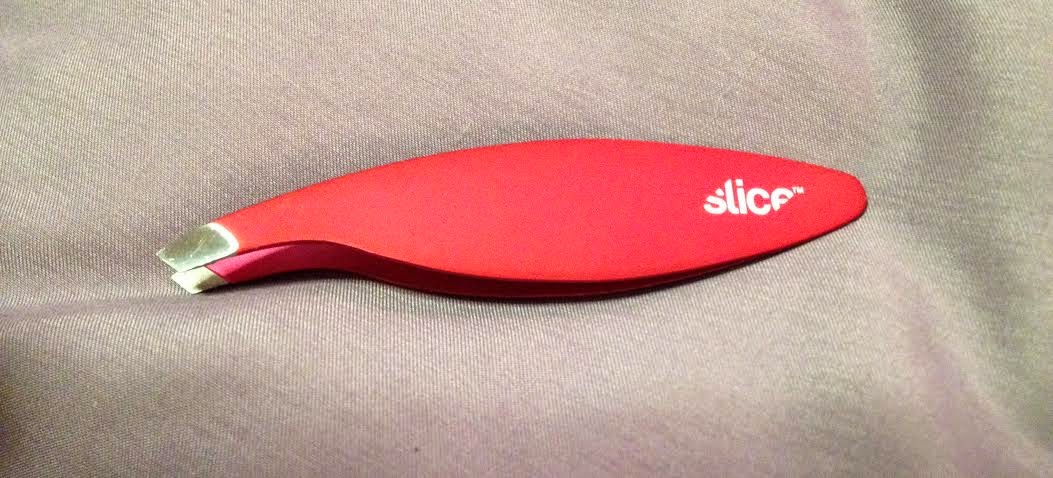


Materials:
-clear brow gel
-eyebrow spooley brush
-eyebrow powder, pencil, or gel
-cotton swabs (optional)

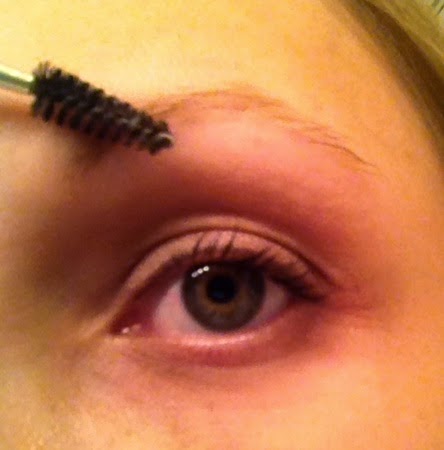
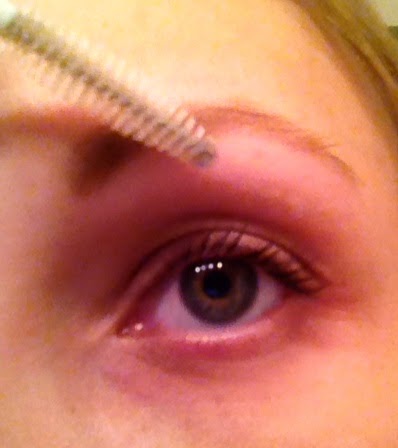
1. With a spooley brow brush, gently brush eyebrow hairs up and out to see your natural shape.


2. Next, line up the stencil so that your eyebrow hairs are in the middle of it. The middle is a good way to go, because if you do too high or too low, the color stands out and looks a little strange. Believe me, I have done it! For now, just worry about the first half of the arch. You can adjust the arch to be higher or lower if you want to. Now, the stencil is actually longer than my natural brow, so I started the end a little higher up. A good rule of thumb for where to line up the edge of the stencil is to line up that dashed black line with the inner corner of your eye.


3. Fill in the entire stencil area with brow powder, pencil, or gel. Sorry, I don't have another hand to show you a pic of me applying the powder and still holding the camera. Boo hoo! Remove the stencil and look at the brow. Shade as needed in any sparse areas. I used powder because it is easy to apply in a larger area, and cleans up easily, but I have found that the staying power is not as good as a pencil or a gel. Just something to keep in mind.


4. Clean up any loose powder. If you don’t like a particular edge, you can use the cotton swab to easily clean it up.

5. Lastly, use some clear brow gel to set the color. Gently brush eyebrow hairs up and out as you did before.


Ta-da! That’s it! Not so scary at all. The most difficult part for me is now doing the left eyebrow and making sure the two arches match and the eyebrows have the same shape ( I also naturally have a great right arch, but a left arch that does not match it exactly!) But I am sure that practice makes perfect. Also, I am going to try a brow gel eventually—as I mentioned earlier, it has better staying power, but the one I have my eye on is out of stock EVERYWHERE! It is the Anastasia Dipbrow pomade in Blonde. Seriously, it must be super popular because I can’t get it at Ulta, Sephora, or even direct from Anastasia’s website. Stay tuned!


Sunday, July 7, 2013

Clarisonic Mia

As I am sure you know, skincare is of the utmost importance to me. Partially, I have been blessed with good skin genes, but that's only half of it. The other half is that I take really good care of my skin. This includes drinking a lot of water throughout the day, washing my face with a good cleanser twice a day (when I first wake up and right before I go to bed), and using a moisturizer that has an SPF of 15 or higher after each cleanse. I also use a scrub and do a facial masque at least once a week. I switch up my cleanser each time it runs out also, because after a while, my skin seems to become immune to it, or it doesn't work as well as when I first started using it. All of these things keep my skin looking healthy and young. Literally, that is my secret. I am always excited when I find a new skincare product that I really like and that works for me. When I first heard about the Clarisonic Mia, I was a little skeptical. I decided to give it a try anyways, to see what all the fuss was about.

Clarisonic Mia, I ordered it from Amazon!
I guess you could say this is a bit like having a Sonicare toothbrush...for your face! The Mia comes with 2 pieces (charger and body) and a facial cleanser.


As a note, you do need to charge the Mia for 24 hours before you use it. I didn't realize this until I was all excited to use it, and then had to wait an additional day. Dang! To charge it, the charger has a magnetic piece and it just slides onto the base of the body. Plug it in, and let it charge for a full day.

Getting its charge on!
Once fully charged, get the bristles damp with a bit of warm water. Apply a dime-sized amount of cleanser (any cleanser will do fine--I just decided to try the trial-sized one that came with the Mia). Press the button on the handle to turn the brush on. The bristles are actually very soft and don't stretch or scratch your skin at all.

The Mia and the trial-sized cleanser included
The Mia with the gel cleanser on the bristles
You want to avoid around your eye area because of the delicate skin that is there, but everywhere else is fine. Start on one side of your face and use gentle circular motions until you work the cleanser onto the entire surface of your skin.

Gently buffing my face all over
The Mia runs for a minute, so if you need longer than that, just press the button again. I needed to press it once again in order to finish. After your face is covered, gently rinse it in cold water and gently pat dry with a towel. Apply your favorite moisturizer and you are finished!

Ta-da! Instant beautiful skin
My skin felt amazing! I didn't see as many blackheads after using this, and my skin felt smooth and soft.  I am definitely hooked and will continue to use the Mia on a frequent basis!

Monday, July 1, 2013

Birchbox Subscription (June 2013)

Sup dudes? It's been a while, I know--I am sorry! I have been so busy with my new job that I have barely had any time to even return phone calls. I have a newly discovered obsession though, and it's called Birchbox! I know I am probably a little late to this fad (as I usually am), but basically it is a subscription for $10 that you sign up for, and every month they ship you a box of sample sized beauty products to try. It's a great way to try out new products and find some that you love and didn't even know existed! Plus, who doesn't love getting a package in the mail on a monthly basis!?! I decided to give it a try. Like Pinterest, you have to actually sign up first to be invited. It took me about 3 days to get invited, but it was well worth the wait. Here is the box that arrived! (The outer shipping box was pretty and bright pink but I annihilated it in my excitement!) The theme is "Wanderlust," or the love of travel, which is something I can really get behind!


It contained a multitude of fun beauty loot including:

1. Davines Love Smoothing Shampoo
2. Davines Love Smoothing Conditioner
3. Davines Oi/Oil Absolute Beautifying Potion hair oil
4. Oscar de la Renta live in love Foaming Body Scrub
5. Youngblood Mineral Cosmetics Hi-Definition Hydrating Mineral Perfecting Powder
6. Birchbox + Color Club Wanderlust Collection nail polish in Reign in Spain
7. Four adorable postcards to mail out with scenes from New York, Paris, Barcelona, and London

Here are my reviews on each product:

1. The shampoo was pretty good. It is Indian fig, so it smells a bit light and floral. I'm not a huge fan of that, as I tend to lean toward the fruity smelling stuff like Herbal Essences. But overall, its not overpowering.

2. The conditioner was amazingly rich and smelled floral too. When you lather it in your hands, it feels like a thick, luxurious moisturizing lotion. It left my hair feeling very soft and helped a lot with my tangles. I highly recommend this one!

3. The hair oil smelled citrus-y and added some good shine to my hair. I just squeezed a few drops of this on my hands and finger combed it through my locks. It left a nice, glossy finish.

4. The body scrub was nice and luxurious, but I wasn't crazy about the scent--but then again my sniffer has been a bit off because of allergies. Although, as a side note, I know this is Oscar de la Renta and all, and I probably should have attended some sort of fancy event in a ridiculously expensive ball gown, but I just went through the Taco Bell drive-thru after using it. I know what you are thinking--real classy.

5. The finishing powder was light and absorbed oil well. It kept my face from being shiny all day. I applied it after my foundation to set it.

6. The nail polish is very summery and bright pink. I love pink in general, so this was naturally pretty amazing.

I hope you enjoyed my reviews of the products--stay tuned for monthly ones! Birchbox rocks my socks!!

XOXO

Friday, June 28, 2013

Lori Greiner Tabletop Spinning Cosmetic Organizer

I am always looking for creative ways to organize my makeup and jewelry. Mainly because, well, let's just be real, I have an over abundance of them. I saw a spinning cosmetic organizer on Pinterest originally, and then went searching for one until I found the Lori Greiner Tabletop Spinning Cosmetic Organizer. Seriously, it is one of the best things I have ever bought. It holds all my makeup and brushes (100 items!), and it spins! The only thing that would improve it is colored lights and music (and maybe a cotton candy maker. Hey, a girl can dream). It has multiple compartments with separators and taller side sections for taller bottles. I highly recommend this, and the price isn't too shabby--$30 on QVC. 


Friday, June 7, 2013

Hot Pink/Chevron/Glitter Nails

I stole this look from Pinterest (naturally), but I absolutely loved the combo. It's hot pink, gold with a hint of pink glitter, and chevron. It's fun, bright, and summery. Thanks to the talented ladies at Originails Salon. Check it out!


Monday, April 1, 2013

DIY Pedicure

Who doesn't love a good pedicure? But man, getting those things done on a semi-regular basis can really add up. You don't need any fancy foot bath or anything like I have--a bucket, one of those plastic sink tubs, or the bathroom tub itself will work just fine for what you need. That being said, I will show you how I do my at home pedicures, which I try to do about every other week (if I am lucky!) Especially after wearing boots all winter long, I have a serious case of the "winter feet." Winter feet are pale and never see the light of day!

Materials:
-a towel
-basin for soaking feet in
-nail clippers
-nail file
-cuticle stick
-pumice stone
-nail brush
-foot lotion (mint is a good one!)
-foot soak (or a liquid soap of any kind)
-clear nail polish
-color nail polish
-toe separaters

1. Fill up a basin with warm water. Add a little bit of foot soak (the one I have is lavender). Let your feet soak for about 10 minutes.


2. Use the nail brush to gently brush your toe nails at the tip using a left to right motion.This is to remove any dirt from under the nails. Notice my red feet--that water was HOT (but that's how I like it!)


3. Use the pumice stone to scrub the dead skin off of the foot, focusing particularly on areas that are hard and calloused, like the heels, sides, and bottoms of the toes.


4. Generously apply a foot lotion and massage it into your skin from toe to heel. I use mint because mint tends to not only feel tingly and clean, but is also deodorizing, which is a fun bonus.


5. Use the cuticle stick to push the cuticles down on each nail. Gently trim the cuticles with a nail clippers, if needed.

6. Clip toenails if they are long, and file them. Make sure when you file that you don't use a back and forth motion, because doing that actually makes the nail raggedy. File in one direction only to smooth sharp corners.

7. Use toe separaters to separate toes for painting.


8. Apply a coat of clear nail polish or undercoat. Allow to dry thoroughly, at least 15 minutes. Do not apply the next coat if the nail is still wet or tacky.

9. Next, apply a coat of nail polish in the color of your choice. Allow to dry thoroughly, at least 15 minutes.


10. Apply a second coat of the nail polish. Allow to dry thoroughly, at least 15 minutes.

11. Finish by applying one more coat of clear nail polish, to prevent chips from happening. YOu can remove any paint on your skin using nail polish remover. I usually take a shower and gently scratch it off in the warm water with my fingernail.


12. Ta-da! Beautiful toes, beautiful feet. Now isn't that nice? Your feet (and wallet) thank you.

Monday, March 25, 2013

Dry Brushing

So, I just found out about this great skin exfoliating technique called dry brushing. I did some research on it, as I always do, because I don't tend to take beauty and health tips for truth based off of one source or what one person says.

It is supposedly really good for circulation, as well as exfoliation of the skin. Some claim it is even good for getting rid of cellulite. I am not sure how true that last point is, but I could definitely understand the circulation bit because you are increasing your blood flow by stimulating your skin, which in turn boosts your immune system and helps to detoxify. I can also understand the exfoliation bit because you are sloughing off dead skin cells at the surface so that your skin is softer and can absorb nutrients more easily.

The best time to do this is right before you shower, in the shower with the water off, so then after you are done, you can then rinse off all of those dead skin cells (yuck!). It is recommended to do this at least 1-2 times per week. Also, avoid brushing your face (you have very delicate skin there), and do not attempt this if you have existing skin problems like eczema, acne, a rash, cuts or lacerations, etc. I got the majority of my information from this site.

Materials:
-a brush with natural bristles and a detachable handle (I got mine at Target for pretty cheap in the skincare aisle)

1. Remove the handle of the brush. Get naked! (HA! I have waited so long to be able to say that for a step 1 in a post! Sorry to say you will NOT see a picture of me naked--this is not THAT kind of a site!)

2. Start with your feet, moving in circular motions, always moving towards the heart. Do the bottom of your feet first, and then the top. You are going to want to brush gently on areas in which the skin is thinner (like the top of the foot) and a little harder in areas where the skin is thick (like the bottom of your feet).


3. Work up each leg, one at a time, first at the back of the leg, using the same soft, circular motions towards the heart. Move up through the buttocks, and then to the front of the leg. Avoid any delicate skin, like the insides of the thighs.


4. After you are finished with the lower half, start at the fingertips of one arm, and move up the arm and towards the heart. Repeat on the other arm.


5. Move to the back (this is where you will need to reattach the handle to the brush--I've got long arms, but not THAT long!), working your movements towards your stomach. Start with one side of the back, and then repeat on the other.

6. When you get to your stomach, start at your lower abdomen and work your way up. Avoid delicate areas (like the nipples). End at your chest in an upward stroke.


7. Rinse off and shower as usual.

After doing this, my skin does feel softer. It's kind of a weird feeling to get used to though. Also, I enjoyed the massage that the brush gives! I will keep this up at least once per week, when I have the time. :)

Friday, March 22, 2013

Nail Strips

I am pretty boring when it comes to doing my nails, but for good reason. If I was to do nail art of any kind, it would just look BAD. So that being said, I would rather not do it and have nice looking nails than have it look like I had a monkey do my manicure. I decided to give the Sally Hansen Salon Nail Effects a whirl. It seemed easy enough! They now apparently have a gel one too, but the only reason I chose this one over that (other than the fact this one is $2.00 cheaper) is because you have to own a UV light to help with drying, which I do not have.


Materials:
-1 box of Sally Hansen Salon Effects Real Nail Polish Strips (I chose the lace one)
-nail clipper
-clear nail polish

1. Remove any nail polish you may be wearing. Trim and file your nails, as needed.

2. Wash your hands and nails thoroughly with warm water and soap. You don't want any residue or anything on them. Dry them thoroughly.

The kit comes with a nail file and a stick, in addition to the nail strips.


4. Using the flat edge of the stick, push down all of your cuticles. If necessary, trim them with a nail clipper.

5. If you flip the provided nail file over, it is white. Use the white side to gently buffer each nail until it is shiny.


6. See which strips fit which nails best. Some are skinny, some are wider, but the good news is, if you screw up, you have extras!

7. Peel the plastic layer off of the nail strip.Whew--those things smell just like nail polish!


8. Next, peel the nail strip away from the paper backing, tearing it off at the part where the tab is.


 9. Line the nail strip up with your cuticle, and firmly press it onto your nail.


10. Use the flat side of the stick to gently press down all around the bottom and side edges of the nail. Smooth out any bubbles.

11. For the top, gently bend the nail strip, creating a crease in the nail strip. When I did this, the strip actually ripped on it's own.

12. Using the light pink part of the nail file, gently file the remaining edges off of the nail strip.


13. Repeat for all of your nails. You can optionally finish the look with a coat of clear nail polish to help prevent peeling or chipping. Here is the finished product:


Not bad, eh? This is supposed to last for up to 10 days--and you can easily remove them with nail polish remover. However, one thing about my nails is that they are not perfectly flat. They actually have ridges in them, which causes a problem for the nail strip being able to stick to them well. So by the next day, the tops were already peeling off a bit. I don't know that I will buy these again because of that, but it was a good experiment nonetheless. Hopefully you will have better luck!

Monday, March 18, 2013

Tightlining

I recently heard of this eye makeup technique known as "tightlining." I watched a video tutorial and learned more here. I was curious and decided to give it a whirl, so I went out and bought an eyeliner brush and gel eye liner from Target (both by Sonia Kashuk, about $8.00 each). Overall, I really liked the result. It looks very natural and polished, and really makes your lash line look darker (which is great for us blondes!) All I have on in the "After" picture is eyeliner and mascara.


 Materials:
-eyeliner brush
-gel eyeliner (black or brown)

1. If you want to apply a neutral eyeshadow, go ahead and do that before you tightline.

2. Using an eyeliner brush, dip it in the gel eyeliner.


3. With one hand, gently lift the eyelid up.

4. Place the brush at the base of the lash. You actually want to "push" the gel liner into the lashline by pressing and wiggling it. Do this all the way across your lashline, stopping where your lashes end. Make sure you are sticking close to your lashes, and not the rim of your eyelid (the pink part). It's going to feel a little weird because you aren't used to applying eyeliner this way. A magnifying mirror will help you a lot here.You also will want to make sure that you didn't "skip" any places or have any gaps when applying, or it will look like you are missing a patch of eyelashes (which, I am sure, is not the look you are going for!).


5. Finish the look with a coat or two of mascara.