Sunday, March 18, 2018

I Love Publix

Some of you may know or have learned that I am strangely obsessed with Publix grocery stores. When I first moved to Tennessee, I knew I wasn’t going to have my home go-to grocery store, Pick ‘N Save, and that was kinda sad. But it ended up turning out fine because PUBLIX IS EVERYTHING. When I tell you that I am obsessed with Publix, I damn well mean it. I have big love for Publix, and I would be one of those people wearing an I Love Publix apron, sipping from an I Love Publix coffee mug.


Reason #1: Publix has what is called Aprons Simple Meals. What is that? Well, allow me to enlighten you. Usually located not too far from the produce section is a small cooking prep area with a smiling, friendly associate who is cooking up something delightful for you to sample. Sometimes the recipe is dinner, sometimes it’s dinner and dessert, but whatever it ends up being, it is ALWAYS tasty. Second of all, there is a handy dandy recipe card you can pick up. It lists out the ingredients and the recipe you just sampled, including nutritional information.  Most Aprons Simple Meals take about 40 minutes or less to prep and cook from start to finish. Now for me, that’s very do-able on a weeknight. And although there is a featured meal, there’s an entire carousel of recipes to choose from if you want other ideas. Finally (and this is the best part), if you go just around the corner from the meal prep station, you have everything you need to make the recipe RIGHT THERE IN FRONT OF YOU! You don’t have to run around all over the store trying to find all of the ingredients! I’m talking veggies, meat, spices, bread, salad, dessert, wine—all the works are right there in this refrigerated little alcove! It’s glorious beyond measure.

Reason #2: Publix has everything you need—their selection is very diverse, and I never leave without something I have to get from another grocery store (I’m looking at you, Kroger!) Even the weird stuff you have never used or knew you needed before. When I come across a weird ingredient I have never bought or have no idea where it is located in the store (cough, cough, capers, leeks, ponzu sauce, barramundi filets), first of all, I Google it to see what it is and what type of packaging it’s in (can, box, or jar) to clue me in as to where I might find it. Then, I jump on the Publix app or website on my phone, and it will tell me what aisle or section of the store that ingredient is located in. One time I was looking for a salad dressing in the dressing aisle (obviously), and I couldn’t find it on the shelves, so I busted out the app and BAM! It was actually located in Produce. HA! How silly of me to look amongst the dressings.

Reason #3: The clubs. The subscription variety, not the booty shaking variety, BTW. You can become part of the Publix Paws, Wine, and/or Baby Club for no cost, and you will receive emails and snail mail flyers with special deals and coupons. Love this! I have learned so much about wine through their wine club emails, featuring specials and new releases, along with educational tidbits and recommendations. 

Reason #4: Speaking of emails, Publix emails out a weekly flyer with coupons you can clip digitally. Basically, you just enter in your phone number at checkout, and your clipped coupons will be activated. You can also save trees by electing to have your store receipt emailed to you, vs. printed out.

Reason #5: Samples. Especially on weekends, there is usually some sort of amazing sampling going on throughout the store, strategically placed in the deli, bakery, and seafood areas in particular. Especially around the holidays. So come hungry, leave happy!

Reason #6: The FOOD. Oh my goodness, if you haven’t had a #PubSub (Publix sub) or wrap from the deli, or even their fried chicken with sides for lunch or dinner, you haven’t LIVED! Their subs and wraps are always fresh and delicious, and you can put whatever you want on them.

Reason #7: Their bakery. I haven’t had a single bad bakery item from there, but their cakes are a favorite at my work amongst my co-workers and myself. Chocolate ganache cakes, cookie cakes, strawberry cakes, cupcakes, you name it—it’s all SO good.

Reason #8: Their customer service. Everyone is super friendly and nice (a la Chick-Fil-A style, minus the “My pleasure.”). They will even load up your shopping cart and take it out to your car and help you load up your car. I always have to fight them to say I will take it out myself! But I love the idea of it for preggo moms, the elderly, and the disabled, who just need a little extra help.  Need to return something? They also make it super easy on you. I had bought the wrong thing and was able to return it without a receipt AND receive cash back, no questions asked.

Reason #9: Their stores all have pretty much the same layout. This is helpful when I am in a hurry or am shopping over my lunch hour, because I know roughly where everything is that I need, so that I can plan my shopping course to be in and out quickly. 

Reason #10: They are festive AF. No matter the holiday, they have you covered with balloons, card, food to match, candy, decorations, etc. Superbowl? St. Patrick's Day? Easter? Fourth of July? ALL COVERED AND SO MUCH MORE.

So if you have never been to Publix, I invite you to visit one as soon as humanly possible, and experience one for yourself. I promise you won't be disappointed!

Sunday, January 28, 2018

Meal Prep

This is my fourth straight week of meal prepping for 2018. This year, one of my many goals is I wanted to save more money and eat healthier, and this is the perfect way to accomplish both of those goals. You guys, I have saved SO MUCH MONEY by doing meal prep. I used to go out for lunch every day during the week and spend anywhere between $5-15 just on LUNCH. I took a look at my bank account and went, “DAMN, GIRL! WHAT IS YOU DOING?!?” It really adds up fast. I will be completely honest—the biggest thing holding me back from meal prepping was that it is work. Not necessarily hard work mind you, but it does take an hour or two to accomplish, depending on what you make. I am one of those people who likes to enjoy my Sundays and do a whole lot of nothing before Monday rolls around again (aka lazy—let’s just be real). Meal prep takes time, planning, and dedication. Especially because I have to know what ingredients I already have at home and what I need to buy, as well as if it’s a crockpot meal—I can’t start making it at like 8:30p, only to get up in the middle of the night to finish prepping. Nah, bruh. I started small and simple on the meal prep. Now I have a few different recipes I can put on rotation (with some of my own modifications) that I know are a guaranteed tried and true win. They are:

1. Greek chicken with basmati rice, cucumber salad, chickpeas, mini flat bread, and tzatziki sauce (hummus for a bonus too!): https://www.eazypeazymealz.com/greek-chicken-bowls-meal-prep-easy/ (I didn’t use onions or tomatoes because the onions made my breath so flippin’ ripe, and I hate tomatoes, so I used chickpeas instead. I also just bought tzatziki sauce instead of making it, in the interest of time. I also used chicken tenderloins instead of chicken breasts)


2. Curry tuna salad lettuce wraps with cucumber slices, hard-boiled eggs, almonds, grapes, and apple slices: https://damndelicious.net/2017/07/02/tuna-salad-meal-prep/ (I used the following recipe for the curry tuna salad from the America’s Test Kitchen Quick Family Cookbook: Combine 4-5 cans of tuna (flaked), 1 cup mayonnaise, 2 minced celery ribs, 1 cup quartered red grapes, 3 tablespoons lemon juice, 4 teaspoons curry powder, and ½ teaspoon Dijon mustard in a bowl. Season with salt and pepper to taste. Scoop ¾ cup over 2-3 romaine lettuce wraps per meal prep container.


3. Shrimp or beef taco meat with corn, black beans, Mexican rice, avocado slices, diced tomatoes, lime, sour cream, and cheese (This one is suuuuper easy—just fry up the ground beef or shrimp in a pan, add the taco seasoning and cook per the directions on the packet, and then just throw the other ingredients into the container with the meat and rice. I used good ol’ Jell-o shot containers for sour cream, snack bags for the cheese (so it doesn’t get soggy), and lime wedges for flavor)


4. Chicken and rainbow veggies and brown rice: https://gimmedelicious.com/2016/12/17/meal-prep-healthy-roasted-chicken-and-veggies/ (I would actually add even more veggies next time—mushrooms and corn as well! Also used chicken tenderloins instead of breasts)


5. Beef, broccoli, and brown rice: https://lifemadesweeter.com/slow-cooker-beef-broccoli/ (For the meat, I bought the fajita meat that Publix had, so I didn’t have to cut it up)

If you can devote 1-2 hours to meal prepping your lunches for the week you will save money, eat healthier, and have more time in the morning.  Meal prepping can seem intimidating, but it doesn’t have to be! Here is some beginner’s advice to get you started:
  1.  The simplest first step you can take is to find some recipes you like and want to try, and pin them on Pinterest. That’s exactly what I did! I have an entire board devoted to lunch ideas. That way, I can try things out at my leisure.
  2. Invest in some good meal prep containers. I like the divided ones, but you can get plastic or glass ones from the grocery store, Target, etc. I bought 10 so that I never run out of them! Also check to see if the plastic ones are BPA free if you will be heating them up in the microwave. It’s also not a bad idea to get some Jell-o shot containers for dressings and sauces.
  3. Make the food! This is the fun part. I always plan to make 6-7 meals per week. This way, if my husband is home, he can try a few as well during the week. And if I have extras over the weekend, this makes a quick Saturday lunch as well.
  4.  Budget your time on Sunday. How long will the prep and cook time take in total? Don’t start cooking too late at night.
  5.  Keep track of what meals you like, and rotate them, so that you don’t get sick of eating the same food all of the time. I like variety!
What are your favorite meal prep recipes?


Friday, January 15, 2016

30 Life Lessons

Well hello there! It’s been a little long while. I know, I know—I have been slacking a bit on the blogging. Life’s been crazy! It’s been over a year and a lot has changed. And I mean, a LOT. I’ve been doing less documenting of life via blogging, and just more…living. Weird, huh? For one thing, I just got back from VACATION in the Caribbean, and it was amazeballs. Also, I am no longer in my twenties—I became a thirty year old on October 30th! That being said, I thought I would share my top 30 life lessons (in no particular order). The wisdom I am about to impart to you is all things I have learned through experience in some way, some are practical, some are weird like me, so I hope you enjoy them!

                                                    
  1. Moisturize, moisturize, moisturize. When people ask me why I look like I am barely 21 (I get carded everywhere), I am always ready with my classic line, “I moisturize.” But SERIOUSLY, it’s true! I have been religious about it since the 8th grade, when I learned about skincare in modeling school. I stay out of the sun (unless I have SPF 30 or higher on), I don’t go tanning, I don’t smoke, I drink lots of water, and these are all things that keep me looking young.
  2. Don’t go to bed mad. My mom always used to say this to my siblings and I, and it’s true. For one thing, it’s really hard to sleep when you are mad. But life is too short to go to bed feeling mad. What if you woke up and didn’t have the chance to apologize, or worse, you DIDN’T WAKE UP AT ALL.
  3.  Incorporate what you love into your daily life. You love The Walking Dead? Hang up a TWD calendar at work. Love your family and friends? Hang up some pics where you can see them. That way, when you need a little pick-me-up, you are surrounded by them!
  4. Laugh. A lot. I will admit that I laugh about the most random, silly shiggen. My partner makes me laugh every day. I’m weird, and I laugh at weird stuff, but it’s a muscle I work out every day! And (I don’t care how old I get) laughing at farts is something I will never, ever outgrow.
  5. Choose happiness. When you wake up in the morning, and stuff isn’t going your way—you are late, you’re all out of milk, you have a flat tire, whatever—keep in mind that you can CHOOSE to make the best of the situation. Happiness is a choice you make moment to moment, day by day. The more you can see the bright side, the happier you will be.
  6. Indulge! Just buy the thing that is out of your price range if it will make you happy. I dropped some serious dough on a Sleep Number bed this past year, and though it wasn’t easy to part with the cash, it was SO entirely worth it. I thought, well I sometimes have back pain, and I spend ½ my life in bed anyways, so might as well be in extreme comfort. I sleep better, and better yet—my bed has “underbody lighting” so that I don’t disturb my partner in the middle of the night, it is adjustable (raises up and down), it has massage settings, and it’s basically just amazing. I was kicking myself thinking, why didn’t I do this sooner?
  7. Give the gift of your time. Whether you volunteer, take a friend out to lunch, or just listen on the phone, your time is the most valuable thing you can give to someone. Spend it wisely, because in our busy lives, we can only give so much (without burning out). And not everyone deserves your time either!
  8. Remove the negative people from your life. I don’t just mean people with a negative attitude, but those who attract drama to themselves all the time, or have wronged you—perhaps more than once. You don’t need that drama in your life—those happiness suckers. I’m not saying you need to hire someone to kill them, but if they are an emotional drain, or piss you off when you talk to them, then just don’t waste your time or energy on them. Eventually, if they are smart, they will get the hint. Well, hopefully, anyway!
  9. Be open-minded. Try new things. I used to HATE country music. I don’t even really know why, because my grandparents loved it. Well, I liked a few select songs, but when I started listening it on the regular (reggo, as I like to call it), I realized it wasn’t actually all that bad. There is something to be said for not knocking something until you have tried it. Or maybe just enough exposure will make you like it!
  10. Don’t always say yes; don’t always say no. There’s a good balance to maintain your commitments. I have learned if I say yes to everything, I burn out. It’s a bummer to miss some things, but you have to retain your sanity.
  11. Make time for YOU. In this busy world, make time for some alone time. For me, it is going to the gym, getting a facial, pondering life on my work commute without distractions. Self-reflection is important!
  12. Don’t dwell on the past. Use it to learn and move on with your life. If you think always about your regrets or the way things “might have been,” you are depriving yourself of the good things you have in front of you right now. You can’t change the way things were, but you can change the way they will be. You have your whole life ahead of you, and many chapters to write.
  13. Listen to your gut. If you feel a certain kind of way about something, but you can’t really explain it, chances are there is some truth to it. Don’t ignore those gut feelings you have, because they turn out to be right so many times.
  14. Be kind to all. I cannot stress this enough, whether it is the CEO of a company or your waitress. You don’t know the struggles they have been through, and just because someone may not have the most glamorous of jobs, that doesn’t mean you should treat them as less of a human being. Also, before you react out of anger—stop and think about what you are about to say. People will remember your hurtful words, sometimes as long as they live, so don’t say something you might later regret.
  15. Don’t sweat the small stuff. I have this earring tree that holds like 100 pairs of earrings. It got knocked over accidentally by my partner, and earrings and earring backs were literally everywhere—all over the room. Some of the earrings even got broken. But rather than flipping out about the time it would take to re-organize it, or the huge mess or the broken earrings, I took a deep breath, and just cleaned it up. Because you know what? It wasn’t worth the energy to get angry, especially over something that was an accident! And he apologized and helped me locate the earrings. We bonded over me talking about my favorite ones, or where they came from. They were all cheap ones anyways. It’s just stuff!
  16. Take care of yourself. I mean eat healthier, get a little exercise in however you can. Walk. Dance. Move. I started going to the gym about 3 years ago, and wish I would have done it sooner, honestly. It’s hard to get started, but I sleep better at night, have more energy, am more aware of what I eat, I feel stronger, I like the way my body looks, and it’s a bonding experience with my partner, when we can go to the gym together. Don’t get me wrong, I love beer and wine and don’t plan on giving those up anytime soon, but just moderation, as with anything. You only get one health, so don’t throw it away. (I still hate cardio and probably will forever!)
  17. Save some money. Again, something I wish I would have started doing much sooner. Saving money is good for emergency situations. They say you should have about 3 months of your earning put away, but I think it should be wayyyy more than that. You never know what could happen! And I use some of the saved money on fun stuff, but I always replace it. It takes time to build it up, but the cushion is good to have!
  18. Pay your bills first, THEN have fun with what is left over. Unless you want to end up living at your mom’s house when you are 40. I know it sounds cliché, but be responsible with and about your money. After all, Mom isn’t going to be around forever to take care of your broke @$$.
  19.  Learn about another culture. Learn another language. Travel. See the world. It opens your mind and your heart so much. It allows you to experience life from a different perspective and more readily accept the differences of others. Overall, it makes you a more well-rounded and cultured individual.
  20. Don’t be afraid to fail. So many people are afraid of failure. It sucks. It hurts. It costs. But honestly, it teaches you so much. You come out stronger, wiser, and more humbled. Everyone needs a reality check once in a while. I don’t think there is such thing as a life fail. You can always find things to be grateful for.
  21. Tell the people in your life that matter that you love them, and tell and show them often. I wish I had said it more to my grandparents when they were alive. I would give anything to be able to get off work, go pick up my grandmother, and just drive around or go out to eat. Our time on this planet is so short, and life gets so busy that the time just flies and flies. Don’t become too busy to let someone know that you are thinking about them or that you care. A good friend of mine said to me recently that he remembered how I send actual mail to let friends know that I care about them. It’s true—call me old-fashioned, but snail mail is where it’s at. Plus who doesn’t love getting mail?
  22. Be generous. Hint: you don’t need to be rich to do this. Be generous with your time, your love, your happiness. It’s a good feeling to give to others in whatever way you can, and see them smile and brighten their day. Who wants to hang around selfish people who only care about numero uno? Or spend all of their time and money on themselves? Those are the people who end up alone and unhappy in life, full of regret.
  23. Give a crap about something. Have convictions, have beliefs, in whatever that may be! Don’t just agree with what everyone else says and go with the flow like a brain-washed cotton-headed ninnymuggins. Stand up for what you think in your heart is right, even if your voice is singular or unpopular.
  24. Don’t worry about what other people think about you. I have made my peace with this, and let me tell you—it has not been easy or fun. Everything you say, everything you do is going to be judged by other people who don’t even have the faintest idea about who you are. So let those haters keep on creeping on your social media, trying to piece together a you that they’ve built up in their own mind. Don’t worry your pretty little head about them. They’re just jealous and insecure about their own lives.
  25. Be a good communicator. I cannot stress this one enough, especially being a communication major. Listen well—that means putting your mobile device down and making eye contact with the person you are talking to. Let them know you care by being engaged, and acknowledge what they are saying—even if you don’t agree with it. When problems arise in your relationships, talk them out. Don’t play games—talk about how you feel and why. Don’t make someone guess that you are mad at them. And if there is ambiguity about things, clear it up, explain yourself.
  26. Be you. Stay true to yourself. If the friends you are hanging around or the person you are romantically involved with doesn’t like you for who you are, in all seriousness, they can go—there’s the door, don’t let it hit you on the booty on your way out. Don’t let anyone change who you are so that they can be happy. Don’t ever lose the things that make you who you are—those things that make you a weirdo. After all, nobody is a better you than you. And there is someone out there who thinks you are perfect just the way you are. Remember, a lion doesn’t lose sleep over the opinions of sheep.
  27. Always have something to look forward to. I am a planner, always planning the next get-together, the next vacation, etc. Having stuff to be excited about is always fun, whether it is hanging with a friend, going somewhere, or trying something new.
  28. Never stop learning. I loved school, and even today I love learning new things that I can turn around and teach someone else, which is why being a trainer is such a good fit for me career-wise. Whatever you are interested in, whether it’s architecture, animals, video games, history, food, or zombies…go learn more about it! (I will be one of those 90 year old ladies getting her 4th doctorate). Every person you meet knows something you don’t!
  29. Make a BAMF LinkedIn Profile and keep that shiggen up to date. If you make it REALLY good, then you only need to update it once in a while. Grow your network, make it fun and entertaining, and for goodness sake, do not make it a repeat or regurgitation of your resume. Have a professional pic of just you (no nudity, beer, drugs, costumes, questionable life choices, husbands, wives, children, pets, friends, etc.), use keywords, have a decent summary, and add some skills on there. Get some recommendations from former bosses also (assuming you haven’t burned those bridges). You just never know when your dream job is going to come around knocking. Hey, I got my last few jobs from LinkedIn recruiting, so that’s pretty promising!
  30. Take risks. I’m not saying parachute out of a 350 story building (cuz that’s flippin’ cray) but I mean—if you get a great job offer at another company, or you want to travel the world while you are young—just do it! There are some regrets I have of not doing things, and I would rather have taken the risk and had the experience!
You made it to the end! Wow, you are a trooper--thanks for reading! That’s all I have for now…and the list will continue to grow. Any others you would add? J

Friday, December 19, 2014

Gift Giving Guide


I can haz dis?
Gift giving is really an art, and can be really rewarding. I love giving gifts (because it makes people so surprised and happy). Some people really struggle with ideas of what to get. Have no fear—I am here to help!

I have two words for anyone out there who is struggling with gift giving ideas and is reading this: pay attention. It’s that simple. Know what someone likes (be it a sport, hobby, show, video game, type of clothing, etc. Not sure? Just ask!), and it becomes soooo incredibly easy to buy for them. I also live by the philosophy that if I love it so much, you might love it so much too. At least, that has mostly worked on my friends thus far! Oh, and don’t forget those gift receipts!

*Get crafty. A homemade gift is always from the heart, and there are so many things you can make (just take a gander on Pinterest for TONS of ideas!) In the past I have made a memory jar, glass etched mugs, mix CDs (and tapes, back in the day) and Russian tea. Also, instead of one big expensive gift, get a few little meaningful ones. And finally, take the time to write out a nice message in a Christmas card. Like, who seriously does that anymore (besides me)? Hell, even attach post-it notes to gifts to make it extra fun (especially when sending to long-distance friends and family to give them explanations).

*Go unique. I am all about buying things that people can’t just get anywhere—personalized or just hard to find. Like traveling to another country and grabbing some souvenirs, and hanging on to them until Christmas!

*Food is always good, but be mindful of allergies. I would never buy orange juice for my friend Kelly, for example, because that would kill him, and that’s not really the message I want to send (especially at Christmas time). Oh and fruitcake—don’t do it. Just...no.  Candy is good though—chocolate especially. And there is definitely no shortage of that around the holidays!!!

*If you are going to buy someone underwear, don’t do it unless either you are either related and it’s a necessity or you are romantically linked. I mean, how would you feel if a casual acquaintance or co-worker bought you a thong? (Think Buddy the Elf and that sexy teddy he got for his dad—HA!)

*Go practical. Some people really need things. As an example, every single year, my mom always wishes for a kitchen timer, measuring cups, and slippers. She goes through these like crazy somehow. There’s also the gifts that you think someone might need also (like hint, hint kind of a thing). Have a friend who is always late? Get them a watch. Or a boyfriend who never remembers a birthday? Birthday calendar, FTW (and write in all his family member’s birthdays on it).

*Clothes are generally safe, but sizing might be tough. Also, only buy if you know it’s their unique style or something they really dig. Always get a gift receipt! Socks and winter gear like hats, gloves, and scarves are a no-brainer.

*Be wise, accessorize: You can never buy enough bling! It doesn’t even have to be pricey to look cute. I buy 90% of my baubles from Tar-jay (Target). Fashion scarves, purses, wallets, backpacks, etc. require no sizing, so go bananas!

*Gift cards are pretty safe and universal, if you don’t have time to shop or don’t know someone well enough to get them a more personal gift.  Secret Santa, anyone?

*Perfumes, colognes, and body sprays and body washes are great gifts, but be careful. You may unintentionally send someone the wrong message (that they are stinky). So, unless that is your intention, just proceed with caution. Some people (like myself) are also very picky about the scents they will or will not wear.

*Have some feels and go sentimental. I LOVE anything from UW-La Crosse, as that’s where I went for undergrad. Get me UW-L gear or ANYTHING alumni and I will love it. Pictures are good too for friends, and family. Print a good one out, buy a nice frame, and boom—instant keepsake.

*Alcohol: good for the bestie, not so much for the boss.

*Gag gifts are fun, but make sure they aren’t too offensive. Avoid religious and politically themed gifts, if at all possible. I bought the oldest co-worker I have a funny picture book called All My Friends Are Dead. He loved it, and thought it was hilarious.

I am a BIG online shopper, but that only really works out if you have time to ship things. Here are some of my favorite websites to buy nifty giftys:
Everything: Urbanoutfitters.com, Amazon.com
Artsy Crafty: Etsy.com
Beauty: Sephora.com, Birchbox.com
Décor: Westelm.com
Clothes: Anthropologie.com
Shoes: Zappos.com
Nerd: Thinkgeek.com
Tea: Davidstea.com
Fave in-store shopping: Target, Kohl’s, Barnes and Noble, Best Buy

So now that you’ve got the gift part down, time to wrap. Hate wrapping? Enlist a friend to help or take your gifts to a wrapping station in a department store (or Barnes and Noble!) Or get a gift bag and tissue paper. No wrapping paper? Get creative and use a paper grocery bag or newspaper for wrapping paper (especially the comics section). Bonne chance, mes amis!

Sunday, August 10, 2014

Beer Hair Masque

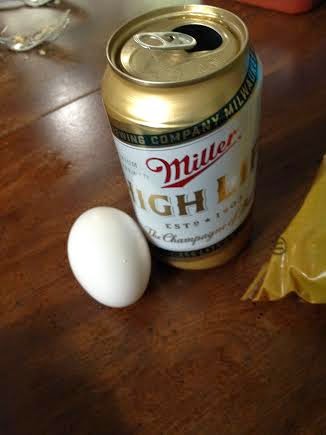
I have heard that beer is good for your hair, and I remember reading back in the day (haha) that pouring a can of beer on your hair and letting it sit can do it some good and make it shiny. This masque was virtually the same as that, with an addition of an egg yolk. I admit, it's a bit of a weird, gross combo--but if you can get past that--it really works! I found this recipe on the Internet randomly.

Ingredients:
-1 egg yolk
-1 3/4 or 1/2 can beer (I used Miller High Life--which was left over from my beer cheese dip recipe!)


1. Mix the yolk and beer together. Silly me, I poured the yolk right into the can and then shook it up. Naturally, it exploded all over my pants and I smelled like a drunk, just in time for work. Umm...yeah. Don't do that. LOL! Save this for the weekend when you have nowhere to go!

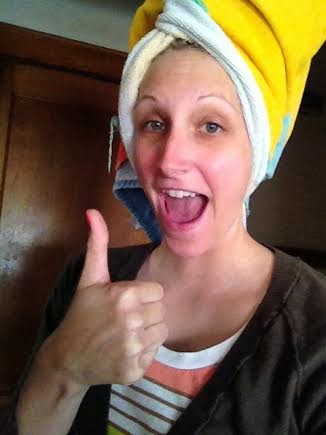
2. Pour the mixture all over your hair, and wrap it up in a shower cap or towel. Let sit for 30 minutes.


3. Rinse your hair with warm water until the water runs clear. Shampoo hair as usual, but do not condition.

Tuesday, August 5, 2014

De-Cluttering Your House


This is a guest post written by Stephanie Hanson, community manager of Monkey Bar Storage Solutions.

If you’re like the majority of Americans, you hold onto stuff. It’s certainly okay to hold onto things when they have a sentimental value! However, many people hold onto so much stuff that they find themselves with less and less space for the important things in their homes. Use these tips on how to clean out the clutter in your life, that are from the professionals organizers at Monkey Bar Storage.


Decide on Function: The most important thing for you to do when working on an area of the home is to decide what that room or area’s function is. It doesn’t matter what the current state of that room or area is, just think about what your ideal use for that room would be. You may note the need for decluttering when you realize that one room is having to supply multiple purposes that it wasn’t intended for.


Small Sections: Chances are that you’re not superhuman and don’t have the time to organize your entire home all at once. Instead, try tackling small areas. Eventually, these small areas will add up to a big difference that you can see in your home.


When Is The Last Time I Used This? The reason that so many of us keep unneeded items is because we don’t ask ourselves the last time we used them. If you haven’t used something in longer than two years ago, then chances are that you won’t use it again. If you don’t want to throw out something that is perfectly usable, try donating those items to your local Goodwill or thrift store.


Customized Solution: Now that you’ve thrown out things that you won’t use again and cleared out space, now is the time to make a habit of putting things back where you got them. Nothing makes this easier than having a customized solution. Consider shelving to get lots of items up and off the floor, creating valuable floor space. If you have a lot of little items that you want out of sight, cabinets are a great option. If you have animals or small children in the house, consider using lockable cabinets to ensure safety.


Reinforcement: Be sure to reward yourself for all your hard work! Whether it’s a piece of candy, a movie, or a trip out of the country, you decide. By rewarding yourself you’ll be more inclined to keep the room or area of your home clean and tidy.


Stephanie Hanson is the community manager for Monkey Bar Storage Solutions, a garage storage and organization company serving homeowners in the Milwaukee area.

Monday, July 28, 2014

Slice Tweezers

So, I decided to add a new section on product reviews--yayyy! After all, there's nothing more I love than trying and falling in love with new products (that's why I love my Birchbox subscription so much!) This is a very special post because it is the first one of its kind on my blog.

First and foremost, this post was made possible due to the generosity of the founder of Slice, who sent me a pair to demo and review, as well as my friend Kim for putting the two of us in touch, always recommending great beauty loot, and inspiring me to branch out in a new direction on MIWS. So a big thank you to both!

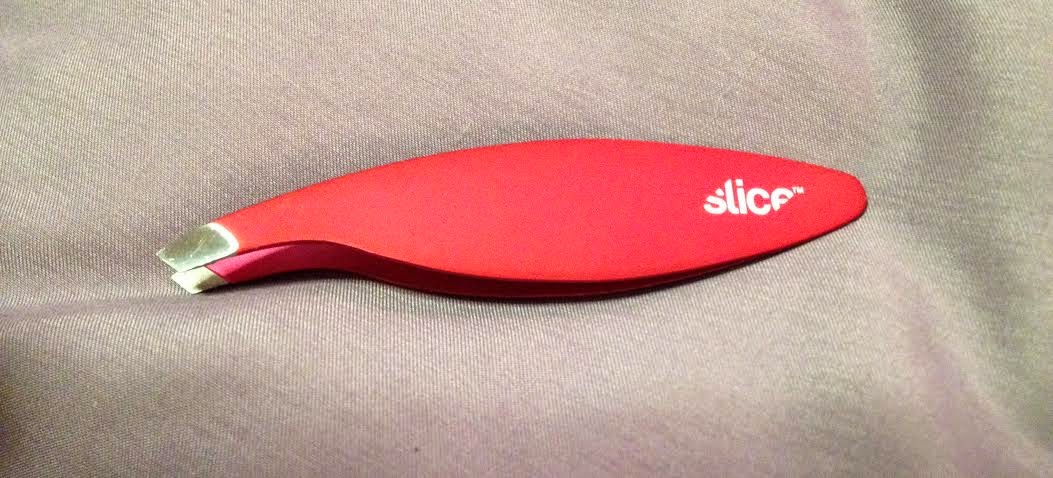
Let's get down to it, shall we? The product I am reviewing are the Slanted Soft Touch Slice Tweezers, pictured below. They retail for $19.99 here on the Slice website. I've tried a few different types of tweezers in my life, but here is what I particularly liked about this pair:


-Design: They are big--but where it matters most. The size didn't obstruct my view when I was plucking my eyebrows with these bad boys. They are comfortable to hold in your hand and easy to control. They were designed by famed architect Michael Graves!

-Ease: They are made of a rubberized finish, so they don't slip out of your hand--which is perfect for klutzes like myself.

-Precision: The tip is slanted, so I was easily able to pluck those stubborn little hairs that normally are not even long enough to pluck as they are growing back in.

-Sanitary: These are easy to clean--I just used an alcohol wipe to clean the tip, which is made of stainless steel.

-Sharp: If you aren't using these for beauty purposes, but to remove a sliver, for instance, you won't have any trouble at all! I have used dull tweezers before that have had a rounded tip, and they are not the greatest for eyebrow plucking or removing slivers.

-Color: Because who wants another boring, silver pair of tweezers? I love the bold pop of red, and it makes it easy to find in my makeup bag.

On a scale of one to ten (with one being the worst and ten being the best), I would give these Slice tweezers a nine! I would highly recommend them as an essential tool to any beauty arsenal.

Tuesday, July 22, 2014

Wisconsin Beer Cheese Dip

Being a Wisconsinite, I love to take pride in all things Wisconsin--especially cheese, milk, and beer! I found this recipe on Pinterest and gave it a try--it was such a hit at my cousin's 4th of July party, I had to make a batch just for our family to snack on! I love dips, and this is a really simple one.


Ingredients:
-1/2 can beer (I used Miller High life, a Milwaukee favorite, of course)
-2 blocks of cream cheese
-1 packet dry ranch seasoning
-shredded cheddar cheese
-pretzels or chips (for dipping)

1. Let cream cheese sit out until room temperature (I heated mine in the microwave for like 2 minutes because I was impatient!) Combine cream cheese, beer, and ranch seasoning in a bowl and mix well.


2. Transfer dip to a Tupperware container. Place in fridge for 2-3 hours.


3. Before serving, top with shredded cheddar cheese. Serve with pretzels or chips.


Monday, July 21, 2014

Smelly Shoe Repellent

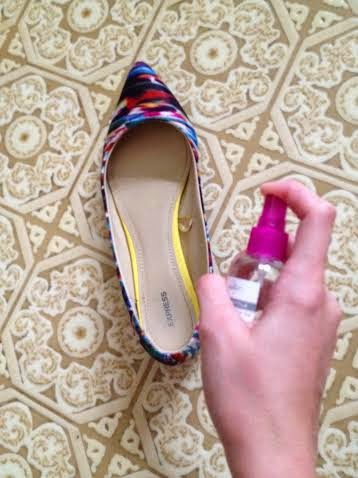
I am not a fan of wearing socks, as much as I can possibly get away from it. I even own those little nylon socks that barely show in flats, but they always irritate me, bunch up and don't stay in place in my shoe. So naturally, my shoes can get a little smelly when my feet sweat. I saw this great trick on Pinterest, and it really works! I do this after I take my shoes off and put them on the shelf.

 Materials:
-spray bottle
-water
-rubbing alcohol

1. Add 3/4 of your spray bottle full of water and the remaining 1/4 full of rubbing alcohol.

2. Before use, shake well and spritz 2-4 sprays inside the shoe and let air dry.


Tuesday, July 15, 2014

Top Loader Washer Cleaning

When I was doing my laundry recently at home, I couldn’t help but notice that the washer was a little…well, gross. It needed some TLC. I remembered seeing instructions on how to clean a washer on Pinterest, and decided to scrub that bad boy from top to bottom. After all, what’s the point of washing clothes in dirty water and bacteria? The total cleaning takes 3 cycles, but you really only need to do it twice a year, which I can definitely handle. The bleach and vinegar kill the bacteria and get your washer sparkling in no time. Trust me, you don't want to see the before picture!

Materials:
-Bleach
-Distilled white vinegar
-Magic eraser


1. Scrub any visible dirt/mildew out of the inside of the washer (including agitator) with a magic eraser.

2. Fill washer with hot water. Add in one quart of bleach. Let washer agitate for one minute. Then, let sit for an hour. Use washer’s longest cycle to rinse.


3. Fill washer with hot water. Add in one quart of white vinegar. Let washer agitate for one minute. Then, let sit for an hour. Use washer’s longest cycle to rinse.

4. Now, while I was waiting for that second hour to pass, I actually removed the bleach tray and cleaned it and scrubbed down the outer surface of the washer. I detailed it by getting in all the nooks and crannies with a magic eraser.

5. Use the washer’s longest cycle to do a final rinse. That’s it! Now you are good for another solid 6 months.


Monday, July 14, 2014

DIY Bath Bombs

Ok, I admit that I am a little late to the game, but I didn’t know what Lush was until I did my summer internship in Montreal back in 2007. We didn’t have any close by in Wisconsin, but now we have one in Mayfair Mall. I like their stuff a lot, but man—it can be pricey! I got some bath bombs as a gift for Christmas a few years ago, and really, I like anything for the bathtub.  I discovered a DIY bath bomb recipe here and decided to give it a whirl.


But before I jump into that, here are my learnings from this project: I recommend getting smaller ornament molds, as mine were HUGE! I ordered 80 mm ones on Amazon, and they kinda broke easily too. Big ones means you only make 2-3 bath bombs per batch, vs. a smaller mold of possibly many more bath bombs. Also, all of the ingredients together are a bit pricey. So, I guess the difference is spend the money at Lush and have someone else make them or spend it yourself and do all the work. But you do save a bit by DIYing. I would think plastic Easter eggs would make great molds also! Also, a little food coloring goes a LONG way! My bathtub water was super yellow when my bomb dissolved completely, but the color did not stain me or the tub.

Materials:
-8 oz baking soda
-4 oz Epsom salt
-4 oz cornstarch
-4 oz citric acid
-2 tsp baby or almond oil
-3/4 tsp water (or witch hazel)
-2 tsp essential oils of your choosing (I had spearmint, eucalyptus, orange, and lavender)
-food coloring
-80 mm or smaller plastic fillable ornament molds that snap together (I got , but definitely recommend a smaller size)

1. Mix the salt and all of the powder ingredients together (except the citric acid) in one bowl. Set aside.

2. Mix all of the liquid ingredients together (except the food coloring) in a separate bowl. Slowly add to the powder mix and stir gently. The consistency should be that of wet sand, where it sticks together somewhat. If it is not, slowly add a few drops of water at a time while mixing and squeezing it in your hand until it is like wet sand. Now add the citric acid and mix. Do not test the consistency with your hand, as the citric acid is abrasive.


3. Add the food coloring in last and mix well. I did blue for my lavender scented ones and yellow for my orange scented ones.

4. Fill one half of the plastic ornament past the edge with the mixture. Pack it down tightly.


5. Repeat with the other half of the plastic ornament past the edge. Pack it down tightly. Now snap the two halves together. Seriously, this was the hardest part for me because I could not get mine to snap together. I broke a few halves trying to do this. There should not be any cracks in the bath bomb once the halves are together—just a smooth finish on each side.


6. Allow the bath bomb to dry out in a dry place for 24 hours. I did, and here is what happened when I removed the mold (this one even had cracks and still stayed together!)


7. Add one to your nice warm bath (trust me, one is ALL you will need at this size!) This was the final test for me...


It worked! Fizzy and all, comparable to the real Lush one, like a big glorious citrus ball of bath time happiness.

Monday, May 5, 2014

Mozzarella Sticks

Lately, I have been making a bunch of snacks because my friends and I have been having Game of Thrones nights, where we will get together and watch like 5 episodes at a time, and cook food. My friend Bob gets credit for this recipe—it was really yummy and super easy to make.

Serves: 4
Prep time: 15 minutes
Cook time: 3-5 minutes

Ingredients:
-1 package wonton wrappers
-1 package mozzarella cheese sticks (approximately 8-12)
-egg (for egg wash)
-1 pkg pepperoni (optional)
-1 jar jalapeños (optional)
-marinara sauce, for dipping
-deep fryer

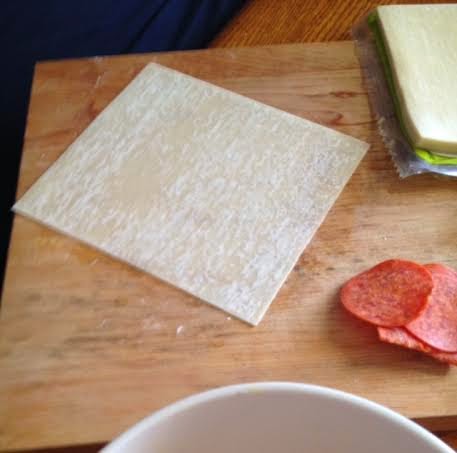
1. Lay out the wonton wrapper on a flat surface in a diamond shape.


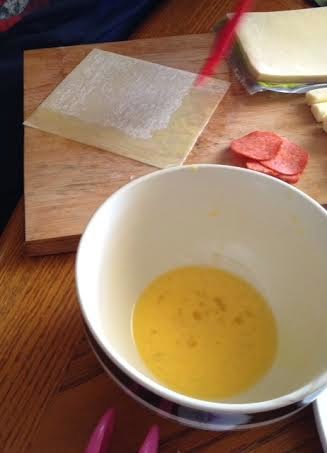
2. Using a pastry brush, line the two sides farthest from you with egg wash, as in the picture.


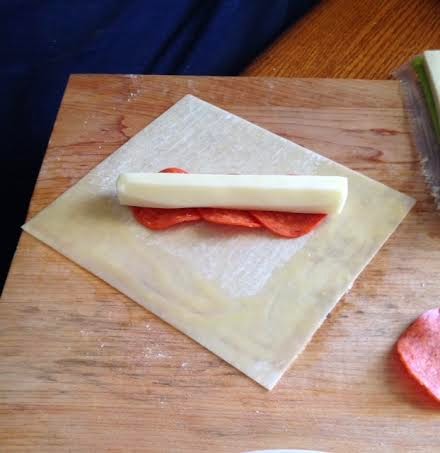
3. If you are going to add pepperoni or jalapeños, add them first in the middle of the wonton wrapper. Place the mozzarella stick towards the lower corner closest to you. It shouldn’t be so low that there is not enough wonton to cover the sides of it.


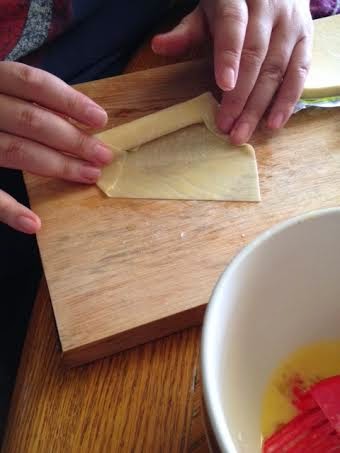
4. Begin to roll the cheese stick into the wrapper away from you, folding in the edges as you roll, as in the picture. Repeat for as many sticks as you desire to make.


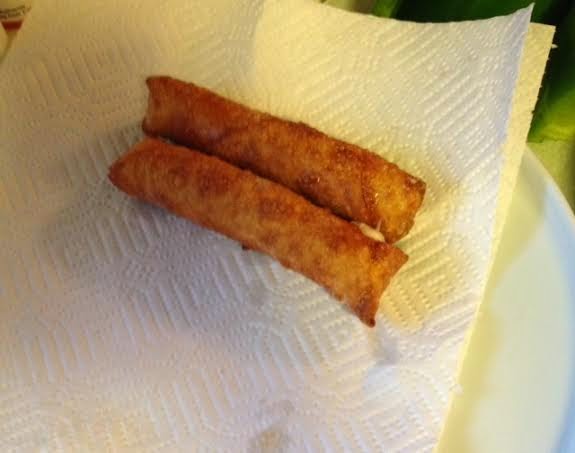
5. Place the mozzarella sticks into the deep fryer, about 2 or 3 at one time. Keep a close eye on them—as soon as they are golden brown, remove them from the deep fryer. If you leave them in for too short a time, the cheese will not be gooey enough. If you leave them in for too long, the cheese will be too gooey, and will leak out of the wonton into the deep fryer grease.


6. Allow 10 minutes to cool. Serve with marinara sauce.


Monday, April 28, 2014

Eyebrow Shaping

They say eyebrows really can change someone’s look, and I didn’t buy into that very much until I saw all the pictures of celebrities without eyebrows. Yeesh! If you haven’t seen them, I highly recommend them to you—they are totally worth the Google. Think Voldemort—that’s mostly what I was reminded of! I have also seen a few “before and after” pics of celebrities who have changed up their eyebrows by making them thicker, darker, etc. It’s amazing how much it can complement their face or even change it up. I’ve always had eyebrows, but they are naturally very thin. Even if I was to just let them go wild, they wouldn’t get very thick at all. I pluck once every other week just the stray hairs that are really outside of my natural brow.  I don’t need to get them threaded or waxed ever. One time, when wandering around the mall, I decided to stop in and have my eyebrows threaded. I settled back into the chair, the lady came close to my face, smiled and said, “There is nothing for me to thread.” Umm…so yeah...some might say that’s a gift that I don’t have to deal with that.

Seriously, just look at Lauren Conrad. Case and point.

I have always struggled with my eyebrows in terms of how to get them to look better—and by better, I mean more shapely, more full, and a little bit darker. I have long been afraid of the pencil, as it can cause such a dark, severe line (in my younger days, I did not color match to my natural color very well at all). About 2 years ago, I discovered the company Anastasia at Sephora. I tried out a blonde pencil and it filled in my thin little eyebrows nicely. So, I bought it and used it for a year and a half. Then, Anastasia came out with a brow powder duo. One shade is lighter, and the other darker. You can actually mix them to get a shade somewhere in between also. I had the Sephora assistant do my brows for me, and she did a decent job. Ok, so it seemed easy enough to use a little brow brush and some powder and fill in my eyebrows. But I still wasn’t going outside of my (thin and short) natural brow shape. Truthfully, I was a little afraid of looking like a dork with unnaturally long/full eyebrows by free-handing them. What if my eyebrow shapes turned out different? What if one arch was higher than the other? There is a saying I have heard and remembered—something to the effect of, “Don’t ever let anyone with bad eyebrows tell you shit about life.” Truth!

Oh, Angelina.
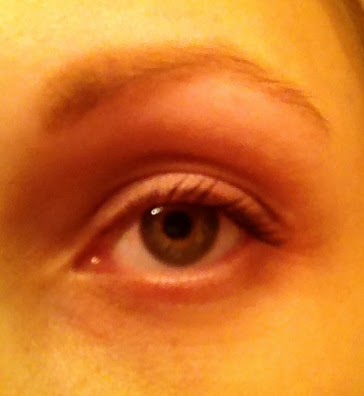
Recently I found out that Anastasia has eyebrow stencils. I was super pumped about this—it’s seriously  really hard to screw up with a stencil I assumed, so I ordered a set of them. I think you get about 5 of them in a pack, so needless to say, I have a lot of choices for “new” brows. I decided to test the water by starting with the smallest stencil, the “petite arch.” Here are my before and after pictures, and the steps I took to get them to look fab.


Materials:
-clear brow gel
-eyebrow spooley brush
-eyebrow powder, pencil, or gel
-cotton swabs (optional)

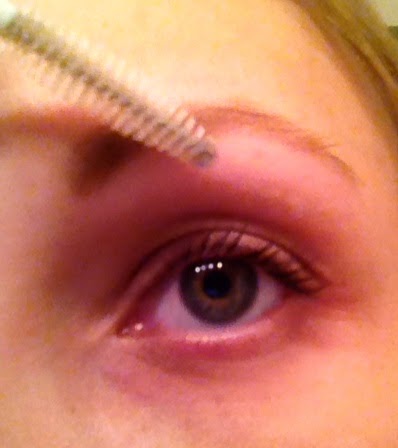
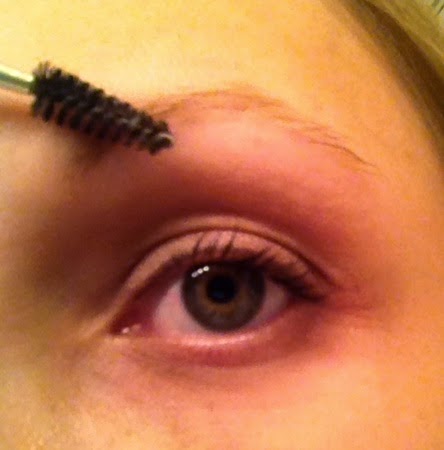
1. With a spooley brow brush, gently brush eyebrow hairs up and out to see your natural shape.


2. Next, line up the stencil so that your eyebrow hairs are in the middle of it. The middle is a good way to go, because if you do too high or too low, the color stands out and looks a little strange. Believe me, I have done it! For now, just worry about the first half of the arch. You can adjust the arch to be higher or lower if you want to. Now, the stencil is actually longer than my natural brow, so I started the end a little higher up. A good rule of thumb for where to line up the edge of the stencil is to line up that dashed black line with the inner corner of your eye.


3. Fill in the entire stencil area with brow powder, pencil, or gel. Sorry, I don't have another hand to show you a pic of me applying the powder and still holding the camera. Boo hoo! Remove the stencil and look at the brow. Shade as needed in any sparse areas. I used powder because it is easy to apply in a larger area, and cleans up easily, but I have found that the staying power is not as good as a pencil or a gel. Just something to keep in mind.


4. Clean up any loose powder. If you don’t like a particular edge, you can use the cotton swab to easily clean it up.

5. Lastly, use some clear brow gel to set the color. Gently brush eyebrow hairs up and out as you did before.


Ta-da! That’s it! Not so scary at all. The most difficult part for me is now doing the left eyebrow and making sure the two arches match and the eyebrows have the same shape ( I also naturally have a great right arch, but a left arch that does not match it exactly!) But I am sure that practice makes perfect. Also, I am going to try a brow gel eventually—as I mentioned earlier, it has better staying power, but the one I have my eye on is out of stock EVERYWHERE! It is the Anastasia Dipbrow pomade in Blonde. Seriously, it must be super popular because I can’t get it at Ulta, Sephora, or even direct from Anastasia’s website. Stay tuned!

Thursday, December 26, 2013

Cheap Jewelry

Let's face it--I am a sucker for jewelry. And it doesn't have to be expensive jewelry, either. I love the baubles I can find at my local Target just as much as anything from Swarovski. But one thing that REALLY sucks about cheap jewelry is when it turns colors on you. When jewelry oxidizes, there is no going back. Luckily, I found a great life hack to prevent that from happening! I found it here. And a nifty bonus--this also makes it hypoallergenic!

This used to be a silver ring---
now it has a copper band and decoration!

This gold ring has seen better days! :(

Materials:
-jewelry
-clear spray paint (glossy finish if you want your jewelry to be shiny!)
-cardboard

1. Lay your jewelry out in a well-ventilated area on some cardboard (I put that leftover wrapping paper that I didn't use to damn good use! Bad idea though, because it stuck like mad to the jewelry and I had to peel it off). Considering it is the dead of winter here in Wisconsin, I just had to do this in my basement and run up the stairs before I got too high off of the fumes.


2. Shake the clear spray paint can vigorously for 2 minutes. Spray each piece thoroughly from about 6-12 inches away. Let dry for about 20 minutes. I left and did some grocery shopping and came back and finished this up.


3. Flip the jewelry over and spray the back side. Let dry for about 20 minutes.

4. That's it! Now your jewelry is element-proof and will stay monochromatic. Awwww snap!